Monday, September 10, 2012

10 minute block table runner

 
Following is quick instructions for a table runner which I made using the 10 minute block method. These instructions are based on the fact that you, the reader, already know how to make a 10 minute block. If you somehow stumbled onto this blog and don't know,  just do a you tube search and you'll find several good videos.

As you can see, I've made 3 ten minute blocks.  I cut nine 4 1/2 inch squares of one color and six 4 1/2 inch squares of another.  If all 3 squares are the same color you cut 12 squares for the blocks and 3 for the centers.  The blocks sew up to be a cat whisker shy of 8 inches square.

I cut three 1 1/2 strips of coordinating fabric for the sashing around the blocks. (You can get away with 2 if you steal 2 eight inch pieces off each strip).  I sew 2 eight inch strips to the first block (One piece on each end).  Sew on the second  block, sew 2 eight inch strips on the third which I then sew to the second.  Then I sew on the side strips.  If you're a legalist, measure the length of  your three framed blocks,  if  you're me I just sew on the outside strips and trim off the extra.

Next step is the outside border.  I cut two 2 inch strips and sewed it on the sides.  I squared up my block and then proceeded to add the pointy ends.  Now I'm not sure I did this the legal way but it worked fine for me.

 
I took my 12 1/2 inch square ruler and set it on top of my partial table runner.  Notice that I have the ruler so that the numbers run down both sides.  If you look at the picture you'll see its resting at 10 inches where the ruler meets the runner.  This tells me if I cut a 10 inch square and then cut it in half I will be able to sew it on the ends of my table runner.  I actually added a 1/4 inch and cut it at 10 1/4 and then trimed off the extra..

I then cut two  2 inch strips for the binding and added it.  If you prefer a narrow or wider binding adjust your fabric width accordingly.

I have seen this table runner done in valentines fabric and instead of sewing down the center square, they left it puffy and sewed a heart in the center.
 

Thursday, January 14, 2010

Christmas Block Exchange

We could have tittled this post miracle in Missouri because I got my 24 Christmas exchange blocks finished, and all sealed up in their little envelope and on their way to Aunt Pity Pat the hostess for the Christmas block exchange with 16 days to spare.

It was an easy exchange with only 12 9 patch blocks needed and 12 themed blocks. I had Ginger Bread houses.


Tuesday, December 15, 2009

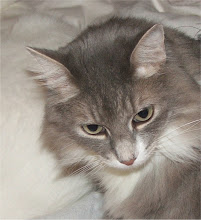
Donations for Fiona

Below is a collection of hand woven scarves which I've made in the last couple years. They are being donated to help raise green papers for our friend Fiona (da cat, not Monk's partner) get some much needed dental care.

The first item is made with hand dyed cotton yarn that has been dyed with cool-aid. It is almost four feet long and a tad less than 8 inches wide. It was desinged as a dresser scarf


The next scarf was woven by me. The warp yarn is a mixture of linen and silk, the weft yarn is man made (more likely woman made) from synthetic scrap that is dyed and spun in India by artisians.

Just for your gee-wiz, the warp is the length wise yarn in a weaving and the weft goes from side to side. The scarf has a crisp texture and would go well as a belt on a little black dress or as a scarf. It measures about 50 inches long and is 7 inches wide. The fringe is about six inches long.


These three scarves are all hand woven by me. The one on the left is soft wool yarn with just a tiny bit of gold tinsil woven in. The warp yarn is quite bulky (in a good way) and it's four feet 4 inches plus fringe. It's about 7 inches wide and is made for those cold winter winds.

The middle scarf is a light weight woven wool. It's one of my earlier projects so there may be a few boo-boo's in the weaving. It's a warm five feet five inches. This would be a great scarf for either a man or woman.

The last one, which I call black raspberry is a combination of two types of yarn. It is very soft and warm. It is five feet eight inches long, 8 inches wide with a fiveish inch fringe. It would go well with either a sweater or with a black outfit.

All scarves are made with high quality yarns.


The next two donation items were made in Bangaldesh. They are exquisite counted cross stich. The bookmark is 31/2 inches wide and 9 inches long. The saying beneath the child is "The lord is my Light. The second one is 7 inches by 15 (stiching size) on 11 1/2 by 19 inch peice of fabric. The second one would frame up beautifully or could be made into a pillow top.


The next is a crocheted shoulder bag made with what appears to be cotton yarn. It is unlined but could be used to hold yarn for a knitting or crochet project. It's about 8 inches wide and 12 inches long. The shoulder strap is about twelve inches.

Tuesday, November 3, 2009

Opportunity Quilts for C.A.R.E


biped..."This quilt was made using a Moda panel along with coordinating fabrics. It measures roughly 41 X 43 inches. It has low loft batting and a muslin backing. Here is a more detailed photo."


biped...."I used muslin as the backing because of the quilt label that came with the panel. To me it just "MAKES" the quilt."


Ozark Mountain Cats...."And worry not. The quilt is not lop sided. Our photographer can't seem to hold da camera level."

Sunday, November 1, 2009

Quilting 101

We're really embarrassed dat its been so long since we posted. We have been really busy getting ready for winter here in the Ozarks but have been making time for our favorite hobby.

We thought that we might show non-quilters how a quilt is assembled once the top has been made. Some quilts are tied together with yarn or embroidery floss. Some quilts are hand quilted (not in my life time), some are sent off to professional quilters where they are machine quilted. Here in the Ozarks the dream machine is the Gammil which starts around $8,000 and goes up to well over $36,000.00. That type of machine is called a "long arm". It means that in a single pass (row?) it can sew over 16 inches wide.

Since I'm not rich I bought a Pfaff Grand Quilter. We had a rocky start but I've learned it's excentricities and progress is being made on my quilting. Most quilts consist of three layers. The top, the batting and the backing. When I load the quilt on my machine I start with the batting. My quilting table is twelve feet long and I usually load the quilt by myself so I improvise by using blue painter's tape.


I put pieces of tape down the length of the batting so I can "stick" it to the rail that holds the batting.


Once I have the batting in place I roll it up. The roll of batting doesn't have any tension on it. (I'll explain later, trust me.)


For me the batting part is the hardest as it tends to be unruly. Once I have it under control I start loading the quilt back. In the picture below you can see the batting on the bottom. The green fabric is the "leader" for the quilt top. The bar or rail above the green will have the backing fastened to it.


The railing that holds the backing has a grove in it. The cloth is laid over the rail and held in place with a plastic tubing. Some people use cloth leaders and pin their quilts to that. The benefit of using the leaders is that you can buy a smaller piece of fabric for the back. The backing has two rails (round tubes that are used to wind the fabric and ultimately the quilt on). Each end of the fabric is fastened to its on rail.

After the back is loaded, the top is loaded to it's railing. I use a leader (12-16 inch piece of fabric) with the top because it's almost impossible to quilt the last four inches without it. The quilt top and back have tension on them. There is a rachet that keeps the tension equal on both the top and the back. If there wasn't tension the quilt could move right in the middle of your passing from one side to the other. The batting doesn't need tension because it's being sewn in between the layers.


With the top, back and batting loaded, the machine is almost ready to start quilting. In this picture I've brought the batting up and laid it next to the top roller. I will then do the same thing with the quilt top. It will be stiched down in the seam margin.


The quilt top is brought up and laid on top of the batting and then the hard part starts. Deciding on what color thread I'm going to use.


The problem with the mid-width quilting machine is that it only quilts about 9 inches with each pass. After your machine has moved from the left to the right side of the quilt, you have to "advance" (roll) the whole quilt sandwich onto the front rail. This quilt is about 75 inches by 80ish so it will take between 10 and 15 passes of the quilting machine.

When it's cooperating, my machine can stich 1600 stiches a minute. It takes less than a minute to go from one side to the other on this quilt.
Sunday, September 13, 2009

Christmas Kitties Raffle Quilt


An original Ozark Mountain Cat Design made for donation from the 2008 Lorelei Christmas Fabric line. Besides the Lorelei fabric the front is enhanced with bits and pieces of quality 100% cotton quilt fabric.

It measures roughly 43 by 45 inches (Cat’s notoriously are a paw or two off on their measurements) and is backed with 100% cotton fabric that is pieced because of the width of the quilt. It is machine quilted with Premium Sulky variegated quilting thread on the front and solid black Admiral bobbin thread on the back.

The batting is low loft black 100% cotton. It was a cut from a huge roll at a commercial quilting store two years ago so the “brand name” is no longer available. Because of the sharp contrast of colors (reds, whites, blacks) we do not recommend washing it unless you have had experience with fabrics that tend to bleed. If you HAVE to wash it, I would suggest using cold water and at least six “Shout” Color Guard sheets be added to the washer with it to minimize bleeding. I would then allow it to dry naturally and not be put in the dryer.

The following photo shows a close up of some of the quilting. The quilting is done with a Pfaff Grand Quilter. The quilter (term used loosely) has a quilting skill level of C- which is enhanced with lots of heart and plenty of colorful language.


The following picture shows the fabric on the back of the quilt.